



Sound Normalizer Overview
Free Download Sound Normalizer full version offline installer. This program helps you equalize audio volume levels across multiple files automatically.
Sound Normalizer 2.4 processes WAV, MP3, FLAC, OGG, APE, and AAC files to fix volume inconsistencies between tracks. Recording engineers, podcast producers, and home users rely on it to standardize loudness without manual adjustment. The batch processing engine handles entire folders while preserving original quality.
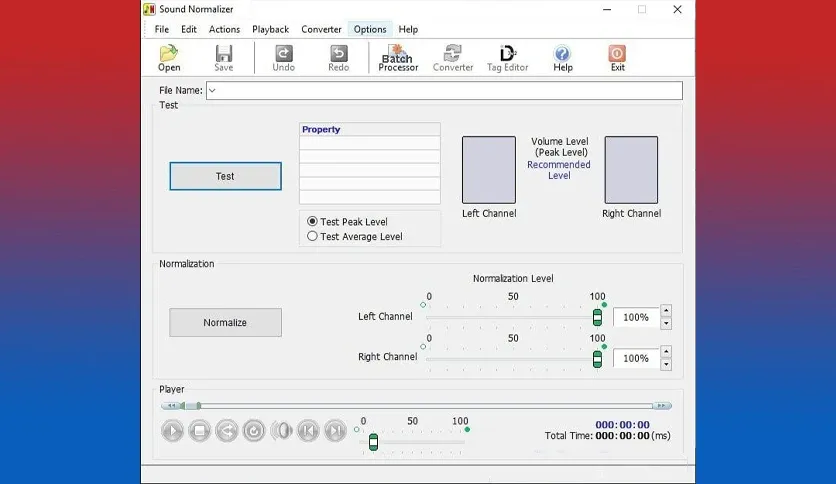
The software detects peak and RMS levels, then applies gain adjustments to match your target loudness. Direct support for popular formats means no conversion steps. A straightforward interface shows waveform previews and lets you compare before-and-after levels side by side.
Key Features
- Batch normalization for hundreds of audio files simultaneously with progress tracking
- Peak and RMS normalization modes with adjustable target levels in decibels
- Native support for WAV, MP3, FLAC, OGG Vorbis, Monkey's Audio, and AAC formats
- Waveform visualization displays amplitude changes before processing
- Volume leveling preserves dynamic range while equalizing perceived loudness
- Tag preservation maintains artist, album, and metadata during normalization
- Command-line interface for automated workflows and integration with other tools
- ID3 tag editor built into the interface for quick metadata corrections
System Requirements and Technical Details
- Operating System: Windows 7, 8, 10, 11 (32-bit and 64-bit)
- Processor: Intel Pentium 4 or AMD Athlon XP
- Memory: 512 MB RAM
- Storage: 25 MB free disk space
- Display: 1024×768 resolution
- Internet: Not required after installation
Installation and Usage Guide
Download the setup package using the button on this page. Run the installer and accept the default installation directory when prompted. The wizard completes in under one minute without additional components.
Launch Sound Normalizer from the Start menu shortcut. Click Add Files to select audio tracks or drag entire folders into the main window. The file list shows current peak levels and formats for each entry.
Set normalization method in the dropdown—Peak mode adjusts files to maximum amplitude without clipping, while RMS mode targets average loudness. Enter your desired level (typically 89% for peak or -12 dB for RMS). Click Start to process the queue.
The progress bar updates as each file completes. Normalized files replace originals by default—enable "Save to new folder" in settings to preserve source files. Check the output by playing a processed track and comparing it to an untreated file from the same album.
For podcast episodes with varying recording levels, add all MP3 files to the queue and select RMS normalization at -16 LUFS. This standard keeps spoken content consistent across playback devices. Process the batch and verify the first episode plays at comfortable volume before uploading.
Command-line users can automate workflows by calling the executable with file paths and target level flags. The syntax processes input folders and outputs to specified directories without opening the GUI. Combine this with scheduled tasks to normalize new recordings automatically overnight.
After processing music collections, use the built-in tag editor to update album fields if normalization changed multiple compilation tracks. Right-click any file in the list and select Edit Tags to modify artist or track number fields. Changes write directly to file metadata.
Mencari link download asli… menunggu 0 detik. Mohon tunggu, biasanya beberapa puluh detik.